Struggling to remove cured epoxy resin from your project? Don’t let stubborn epoxy ruin your day! At Blissam, we’ve mastered the art of tackling tough chemical challenges. Whether you’re a DIY enthusiast or an industrial pro, our expert guide reveals safe and effective methods to dissolve cured epoxy resin with ease. From powerful solvents to simple mechanical techniques, you’ll find practical solutions that work. Ready to get unstuck? Let’s dive in!
Understanding Cured Epoxy Resin and Removal Challenges
Cured epoxy resin is a type of thermosetting polymer that forms a strong, permanent bond once it hardens. Unlike uncured epoxy, which remains sticky and pliable, cured epoxy goes through a chemical reaction called curing that transforms it into a solid plastic-like material. This process makes removing cured epoxy resin much tougher because it is no longer soluble or easily broken down by simple cleaners.
Common Situations Requiring Epoxy Removal
People often need to remove cured epoxy in these everyday scenarios:
- Spills and drips during repairs or crafting that harden on surfaces
- Excess adhesive left behind after bonding parts together
- Mold cleanup where epoxy has been used as a sealer but must later be removed
- Surface refinishing projects where old epoxy coatings need stripping for repainting or resurfacing
In each case, the removal of cured epoxy creates a challenge because it is designed to resist water, solvents, and heat once fully cured.
Why Dissolving Cured Epoxy Is More Difficult Than Uncured
Unlike uncured epoxy that can often be wiped off before hardening, cured epoxy forms a permanent, three-dimensional network. This cross-linked structure makes it:
- Highly resistant to solvents and liquids
- Impossible to dissolve easily without strong chemical or physical intervention
- Difficult to soften without applying heat or harsh chemicals
Because of these factors, typical cleaning agents won’t cut it. Specialized removal methods involving chemical solvents, mechanical scraping, or heat application are necessary to break or weaken the cured epoxy for effective cleanup.
Understanding these basics helps when choosing the right approach to dissolve or remove cured epoxy resin safely and efficiently.
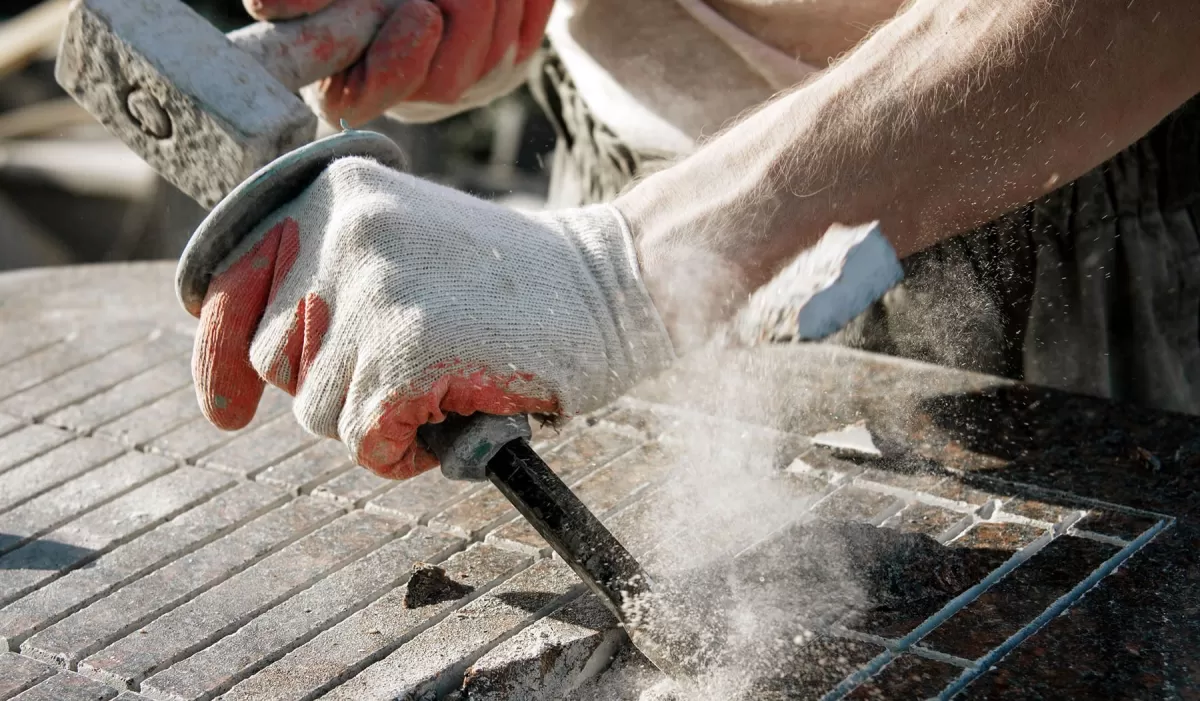
Mechanical Removal of Cured Epoxy Resin
When it comes to removing cured epoxy resin, mechanical methods are often the first choice. This approach involves physically scraping, sanding, or chipping away the hardened epoxy from the surface. While it doesn’t actually dissolve epoxy adhesive, mechanical removal can be very effective, especially for smaller spills or thick epoxy layers.
Tools Needed for Mechanical Removal
- Sandpaper (medium to coarse grit)
- Putty knife or plastic scraper
- Chisel or small hammer for chipping (if necessary)
- Safety gear: gloves, eye protection, dust mask
Step-by-Step Mechanical Removal Process
- Assess the epoxy layer to determine how thick or stubborn it is.
- Begin with a putty knife or plastic scraper to gently lift edges of the epoxy.
- Use a chisel or hammer carefully to chip off thicker parts without damaging the surface underneath.
- Sand the remaining epoxy residue by hand with coarse sandpaper, moving to finer grit to smooth the surface.
- Wipe down the area to remove dust and debris.
Pros and Cons of Mechanical Removal
Pros:
- No need for harsh chemicals or solvents.
- Can be very effective on non-porous surfaces like metal or glass.
- Low risk of chemical hazards if done carefully.
Cons:
- Time-consuming and labor-intensive for large areas.
- Potential for surface damage if tools are too aggressive.
- Ineffective on porous materials where epoxy seeps in deeply.
Mechanical removal is a solid first step for many DIYers and professionals wanting to clean up cured epoxy resin without introducing solvents or heat. Just be patient and take your time to avoid scraping into the substrate.
Effective Chemical Solvents to Dissolve Cured Epoxy Resin

When it comes to removing cured epoxy resin, chemical solvents are a common go-to. Unlike uncured epoxy, which is softer and more reactive, cured epoxy forms a tough, permanent bond that’s not easy to break down. Certain solvents can help soften or partially dissolve the cured epoxy, making removal easier.
Common Solvents for Cured Epoxy Removal
- Acetone: Widely available and moderately effective, acetone can soften epoxy surfaces, especially if exposure is prolonged. It’s safe on many non-porous surfaces but less effective on heavy or thick epoxy layers.
- Methylene Chloride: A powerful solvent that can break down cured epoxy more efficiently than acetone. Be aware it’s very harsh and toxic, requiring strict safety precautions.
- Sulfuric Acid: Sometimes used industrially to degrade epoxy resins, but it’s highly corrosive and dangerous for general use.
- Commercial Epoxy Removers: These formulations often contain blends of powerful solvents tailored for epoxy dissolution. They can be more convenient but still require careful handling.
How to Use Chemical Solvents Step by Step
- Prepare your workspace with good ventilation. Open windows or work outside if possible.
- Wear protective gloves, goggles, and a mask. These solvents can irritate skin and lungs.
- Test the solvent on a small hidden area to check surface reaction and material safety.
- Apply solvent generously to the cured epoxy area using a brush or cloth.
- Let the solvent sit for 10-30 minutes (or as directed), allowing the epoxy to soften.
- Scrape off softened epoxy gently using a plastic scraper or putty knife.
- Repeat application if necessary for stubborn spots.
- Clean residue after removal with soap and water or recommended cleaner.
Pros and Cons of Using Chemical Solvents
| Pros | Cons |
|---|---|
| Can soften or partially dissolve epoxy | Many solvents are toxic and require PPE |
| Often quicker than mechanical removal | Risk of damaging delicate surfaces |
| Commercial removers can be easy to use | Some solvents have unpleasant odors |
| Suitable for getting into small cracks | Not ideal for porous surfaces like wood |
Safety Precautions Are a Must
- Always work in a well-ventilated space to avoid inhaling fumes.
- Wear chemical-resistant gloves and eye protection.
- Follow product-specific instructions and disposal guidelines.
- Avoid mixing solvents or using near open flames—many are highly flammable.
- Dispose of leftover solvents and scraped resin according to local hazardous waste rules.
Using solvents like acetone and methylene chloride can be effective when done right. Just take your time, stay safe, and test surfaces first before full application. For many U.S. users, balancing effectiveness with safety is key, so commercial removers with built-in safety features might offer the best route.
Heat Application to Remove Cured Epoxy Resin
Using heat to soften cured epoxy resin is an effective way to make removal easier without harsh chemicals. Heat weakens the epoxy’s bond by softening it, allowing you to scrape or wipe it away.
Tools Needed for Heat Removal
- Heat gun (most effective and controllable)
- Hair dryer (works for smaller, lighter jobs)
- Soldering iron or hot knife (for precision spot heating)
Step-by-Step Heat Removal Process
- Prepare the area: Ensure good ventilation and clear away any flammable materials.
- Apply heat gradually: Use a heat gun set to medium heat, holding it a few inches from the epoxy surface.
- Observe softening: After 2-5 minutes, the epoxy should start to soften and become tacky.
- Scrape gently: Use a plastic scraper or putty knife to lift or peel away the softened epoxy.
- Repeat if needed: Reheat stubborn spots and continue scraping until all epoxy is removed.
- Clean residue: Wipe down the surface with a cloth dampened with acetone or isopropyl alcohol if residue remains.
Pros of Using Heat to Remove Epoxy
- No harsh chemicals needed, reducing exposure risks.
- Works well on non-porous surfaces like metal or glass.
- Can target small areas precisely using a soldering iron.
- Eco-friendlier option compared to solvents like methylene chloride.
Cons and Safety Considerations
- Heat guns can damage heat-sensitive surfaces like plastic or finished wood.
- Overheating may cause toxic fumes from burning epoxy; always work in a ventilated area.
- Requires patience; epoxy doesn’t melt completely but softens for removal.
- Not ideal for porous materials where epoxy seeps deep.
Heating cured epoxy resin is a practical, chemical-free method that many U.S. customers find reliable, especially when paired with scraping tools. Just remember to control your heat carefully and wear proper protective gear like gloves and eye protection.
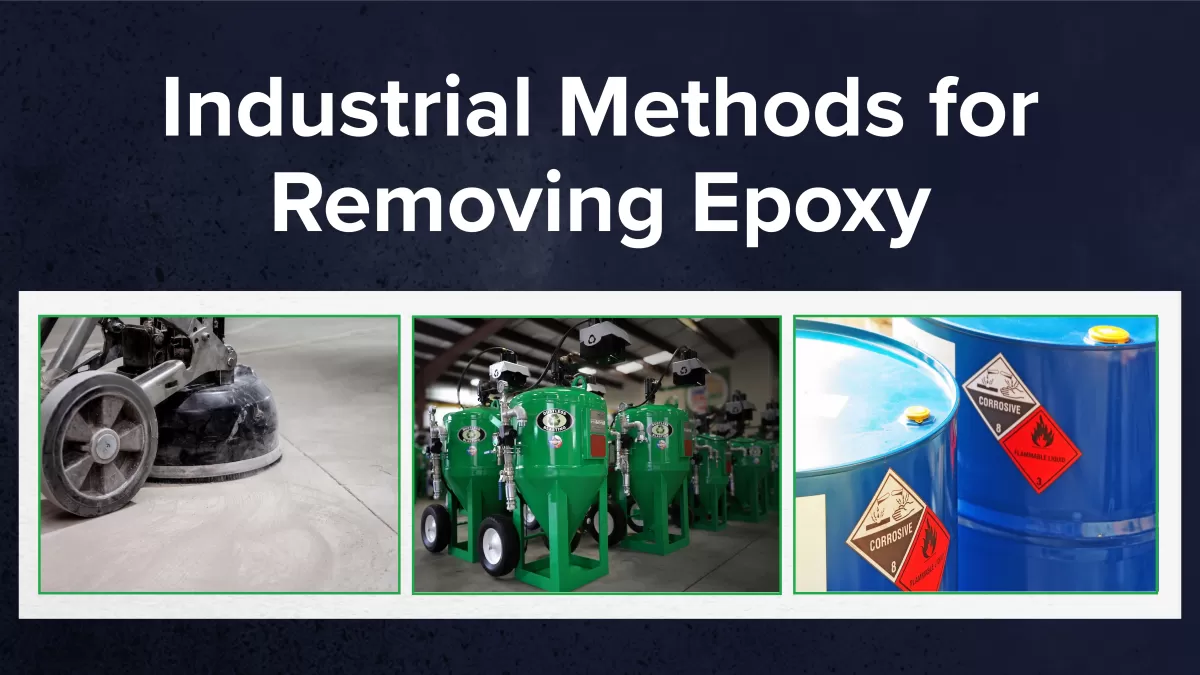
Thermal Shock and Decomposition for Removing Cured Epoxy Resin
When it comes to dissolving cured epoxy resin, most everyday methods focus on mechanical, chemical, or moderate heat techniques. However, an advanced approach involves thermal shock or thermal decomposition, which uses extreme temperature changes to break down the epoxy structure.
What Is Thermal Shock and Decomposition
Thermal shock means rapidly heating and then cooling the epoxy to create stress that causes cracking or weakening. Thermal decomposition involves exposing the cured epoxy resin to very high temperatures—often above 600°F (315°C)—to chemically break down the polymer. These methods are mostly used in industrial settings or specialized applications where other removal strategies aren’t effective.
How It Works for Epoxy Removal
Thermal shock induces cracks in the cured resin, making it easier to chip or scrape off.
High heat decomposition breaks the epoxy down at a molecular level, turning it into a brittle or crumbly material that can be cleared away.
Applications and Uses
Industrial equipment maintenance where large epoxy residues must be removed.
Restoration work on surfaces that can tolerate extreme heat without damage.
Scenarios where chemical solvents pose risks or are ineffective due to the epoxy’s thickness or formulation.
Risks and Safety Considerations
Extreme temperatures can damage underlying materials, especially plastics, wood, or composites.
Requires specialized equipment like industrial ovens, torches, or controlled heating chambers.
Generates toxic fumes and hazardous decomposition byproducts that need proper ventilation and protective gear.
Not suitable for home or casual use due to fire hazards and health risks.
While thermal shock and decomposition are powerful methods for removing cured epoxy resin, they are complex, risky, and best left to professionals. For most users, safer mechanical, chemical, or moderate heat options work better and are easier to manage. If you encounter stubborn epoxy that won’t budge, consulting with an industrial specialist can help assess if this method fits your needs.
Key Point:
Thermal shock and decomposition can break down cured epoxy through extreme temperature cycles, but the risks and equipment needs limit their use mostly to industrial settings.
Surface Specific Removal Tips for Non-Porous Surfaces
Removing cured epoxy resin from non-porous surfaces like metal, glass, and plastic requires careful attention to avoid damage. These surfaces don’t absorb liquids, so epoxy tends to form a solid layer that can be tricky to remove without scratching or etching the underlying material.
Recommended Methods for Non-Porous Surfaces
-
Mechanical Removal
Use gentle tools such as plastic scrapers or putty knives instead of metal ones to prevent scratches. For stubborn spots, fine-grit sandpaper (around 400 grit) can work but test on a hidden area first.
-
Chemical Solvents
Acetone is often effective for softening cured epoxy on glass and metal but avoid prolonged contact on plastics as it can cause clouding or warping. Methylene chloride-based removers are powerful but require strong ventilation and protective gear. Always apply solvents with a cloth or brush—never soak plastic to prevent damage.
-
Heat Application
Using a heat gun on low to medium settings can soften epoxy for easier scraping. Keep the heat moving to avoid warping plastics or discoloring painted surfaces.
Tips to Avoid Surface Damage
- Test solvents and techniques on a small, inconspicuous area before full application. This helps prevent unexpected damage.
- Avoid abrasive tools on glass and plastic, as scratches are often permanent.
- When using solvents, don’t let them pool or sit too long on plastic as it may degrade or discolor the finish.
- Work in a well-ventilated area to protect yourself from chemical fumes.
- Wear gloves and eye protection, especially when handling aggressive solvents like methylene chloride or sulfuric acid.
By following these tips, you can effectively remove cured epoxy resin from non-porous surfaces while keeping the original material intact and looking good.
Removing Cured Epoxy Resin from Porous Surfaces Wood Concrete Challenges and Solutions
Removing cured epoxy resin from porous surfaces like wood and concrete is tougher than on smooth, non-porous materials. These surfaces soak up liquids, making it hard for chemical solvents to work effectively and increasing the risk of surface damage.
Challenges with Porous Surfaces
- Epoxy seeps into pores: Hard to reach deep resin spots with chemicals or scrapers.
- Surface damage risk: Strong solvents or aggressive scraping can ruin wood grain or rough concrete texture.
- Staining and discoloration: Chemicals like paint thinners might discolor or weaken the surface.
- Chemical absorption: Porous materials absorb solvents, which can cause long-lasting damage or leave harmful residues.
Recommended Methods to Remove Cured Epoxy
- Mechanical removal first
- Use fine sandpaper or a plastic scraper to gently chip away surface epoxy.
- Avoid metal tools that can gouge wood or scratch concrete.
- Use safe, gentle solvents
- Avoid harsh solvents like paint thinners or acetone in high concentrations.
- Try isopropyl alcohol or specially formulated eco-friendly epoxy removers designed for porous materials.
- Apply solvents lightly to spot test first and prevent damage.
- Heat application with caution
- Use a heat gun on low settings to soften epoxy before scraping.
- Keep the heat moving to avoid burning or warping wood.
- Clean and condition after removal
- After epoxy removal, clean the surface with mild soap and water.
- For wood, apply a wood conditioner or sealant to restore and protect pores.
What to Avoid on Porous Surfaces
- No paint thinners or harsh chemicals—these penetrate deeply, causing long-term harm.
- Avoid high heat that can crack concrete or scorch wood.
- Heavy scraping beyond the epoxy layer.
For porous surfaces like wood and concrete, the key is a gentle approach combining light mechanical action with mild, safe solvents. Always test first, avoid harsh chemicals like paint thinners, and finish with proper cleaning and conditioning to maintain the surface’s integrity. This method ensures you remove cured epoxy resin effectively without damaging the material underneath.
Surface Specific Removal Tips Fabrics and Skin Safe Methods for Cured Epoxy Resin
When cured epoxy resin gets on fabrics or skin, removal requires extra care. Harsh solvents like acetone or methylene chloride can damage fabrics, irritate skin, and cause unwanted reactions. Here’s how to safely tackle epoxy resin in these sensitive cases:
Removing Cured Epoxy Resin from Fabrics
- Act quickly: The sooner you treat the stain, the better the chance of removal.
- Use vinegar: White vinegar helps soften the epoxy without harming most fabrics. Apply gently with a cloth, let it sit for a few minutes, then blot.
- Isopropyl alcohol: After vinegar, rubbing alcohol can help break down cured epoxy residue. Dab it carefully to avoid spreading the stain.
- Avoid harsh solvents: Never use acetone, paint thinner, or industrial removers on fabric—they can ruin the fibers or cause color loss.
- Wash separately: After treatment, wash the fabric alone in cold water using regular detergent.
Removing Cured Epoxy Resin from Skin
- Soften with vinegar or isopropyl alcohol: These are safe to use on skin and help loosen the epoxy. Apply using a cotton ball and gently rub.
- Avoid scrubbing hard: Don’t try to scrape or peel the resin off forcefully to prevent skin damage.
- Use warm soapy water: After the solvent treatment, wash thoroughly with mild soap to remove residue.
- Moisturize: Epoxy and solvents can dry out skin, so apply a moisturizer after cleaning.
Key Safety Tips
- Always wear gloves when handling solvents, even mild ones, to protect your skin.
- Work in a well-ventilated area to avoid inhaling fumes from vinegar or rubbing alcohol.
- Test solvents on a small hidden fabric area first to ensure no damage.
By using vinegar and isopropyl alcohol as safe removal agents for cured epoxy on fabrics and skin, you reduce risk of damage while effectively lifting the resin. Avoid harsh chemicals here to keep your materials and skin healthy.
Safety and Environmental Considerations for Removing Cured Epoxy Resin
When dealing with cured epoxy resin removal, safety and environmental care must come first. Many effective methods use harsh chemicals or involve dust and fumes, so taking proper precautions is critical to protect yourself and the environment.
Always Ensure Proper Ventilation
Working with chemical solvents like acetone or methylene chloride means strong fumes can build up fast. Good ventilation is non-negotiable. Work outdoors or in well-ventilated areas, and consider using fans to keep fresh air moving. Avoid enclosed spaces to reduce inhalation risks.
Use Personal Protective Equipment (PPE)
Handling epoxy adhesives and solvents safely means wearing the right PPE:
- Gloves: Chemical-resistant gloves protect your skin from solvents and epoxy particles.
- Safety goggles: Prevent eye irritation or injury.
- Respirators or masks: Especially important when using potent solvents or dusting cured resin.
- Protective clothing: Wear long sleeves and pants to minimize skin contact.
Safe Disposal of Epoxy Waste and Solvents
Cured epoxy materials and chemical solvents should never be poured down drains or thrown in regular trash. Follow local hazardous waste disposal guidelines:
- Collect leftover solvents in sealable containers.
- Bring epoxy scraps and waste to designated disposal centers.
- Never mix chemicals or burn epoxy waste — this can release toxic fumes.
Blissam Commitment to Eco-Friendly Chemical Solutions
At Blissam, we prioritize safe, eco-friendly epoxy resin removal options that reduce environmental impact. Our product lines focus on effective yet less harmful solvents and raw materials designed with your safety and sustainability in mind. Choosing Blissam products means you get trusted, compliant solutions tailored to U.S. standards, helping you clean up while minimizing hazards.
Key Tips for Safe Epoxy Removal
- Always work in open, ventilated spaces.
- Gear up with gloves, goggles, and respirators.
- Dispose of all waste according to local regulations.
- Opt for eco-friendly products like those from Blissam whenever possible.
Prioritizing safety and the environment makes epoxy cleanup more effective and responsible—protect yourself and the planet every step of the way.
Choosing the Right Products for Epoxy Removal

Picking the right solvents and tools to remove cured epoxy resin is key to getting the job done safely and effectively. The market is packed with options, but not all products are created equal—especially if you want something that works well without damaging your surfaces or posing health risks.
Best Solvents for Epoxy Removal
- Acetone: A common, easy-to-find solvent that can soften or break down some cured epoxy on non-porous surfaces. It’s affordable but less effective on fully cured, thick layers.
- Methylene Chloride: A powerful solvent often found in epoxy removers. It works well but comes with serious health risks, so proper PPE and ventilation are a must.
- Sulfuric Acid: Used industrially to break down epoxy but too harsh and dangerous for typical home use.
- Blissam Chemical Solutions: Our range offers safe, effective, and eco-friendly epoxy dissolvers designed for industrial and consumer needs. Blissam products balance performance with safety and environmental care.
Tools to Pair with Solvents
- Putty knives and plastic scrapers: Help manually remove softened epoxy without scratching surfaces.
- Sandpaper or sanding blocks: For stubborn residues on durable materials.
- Heat guns: When paired with chemicals, heat can improve solvent action.
Where to Purchase Safe and Effective Epoxy Removal Products
- Specialty chemical suppliers like Blissam provide reliable, tested products geared toward the US market, prioritizing safety and eco-friendliness.
- Major hardware stores may carry basic solvents but often lack specialized removers.
- Online platforms offer greater access to professional-grade solvents—you can find Blissam’s product line on authorized sites ensuring authenticity and quality.
Tips for Selecting Removal Products
- Always verify product safety data sheets (SDS) to understand hazards and handling.
- Choose solvents designed for your specific surface type and epoxy condition.
- Start with milder solvents like acetone before moving to stronger chemicals.
- Consider environmentally friendly options to limit impact and simplify disposal.
- Use proper PPE and ventilation regardless of the product chosen.
By choosing the right combination of solvent and tool from trusted sources like Blissam, you’ll protect your health and workspace while efficiently dissolving cured epoxy resin.
Common Mistakes to Avoid When Removing Cured Epoxy Resin
When tackling cured epoxy resin removal, avoiding these common mistakes can save you time, effort, and health risks.
Using Overly Aggressive Solvents
Many people reach for strong chemicals like methylene chloride or sulfuric acid without proper knowledge. While powerful, these solvents can damage surfaces, cause skin burns, or release toxic fumes if misused. Always opt for the mildest effective solvent first, like acetone or a commercial epoxy remover designed for your specific job. Don’t assume stronger is better—sometimes it leads to more problems than solutions.
Insufficient Ventilation and Lack of PPE
Epoxy dissolving solvents often give off harmful fumes. Failing to ventilate your workspace or skipping personal protective equipment (PPE) like gloves, goggles, and masks puts you at risk of respiratory issues, skin irritation, or eye damage. Always work outdoors or in a well-ventilated area and wear PPE to protect yourself.
Attempting to Dissolve Without Testing Small Area First
Jumping straight into dissolving epoxy on a large surface without testing a small hidden spot can lead to unexpected damage. Some solvents react differently depending on the material beneath the epoxy—for example, plastics can warp, or wood can stain. Always test on a small, inconspicuous area before full application to avoid costly mistakes.
Key Points
- Choose solvents carefully: Start with mild options before moving to aggressive ones.
- Ensure full ventilation and wear appropriate PPE to stay safe.
- Test solvents first on a small surface patch before going all in.
Following these tips keeps your epoxy removal process safe, effective, and damage-free.